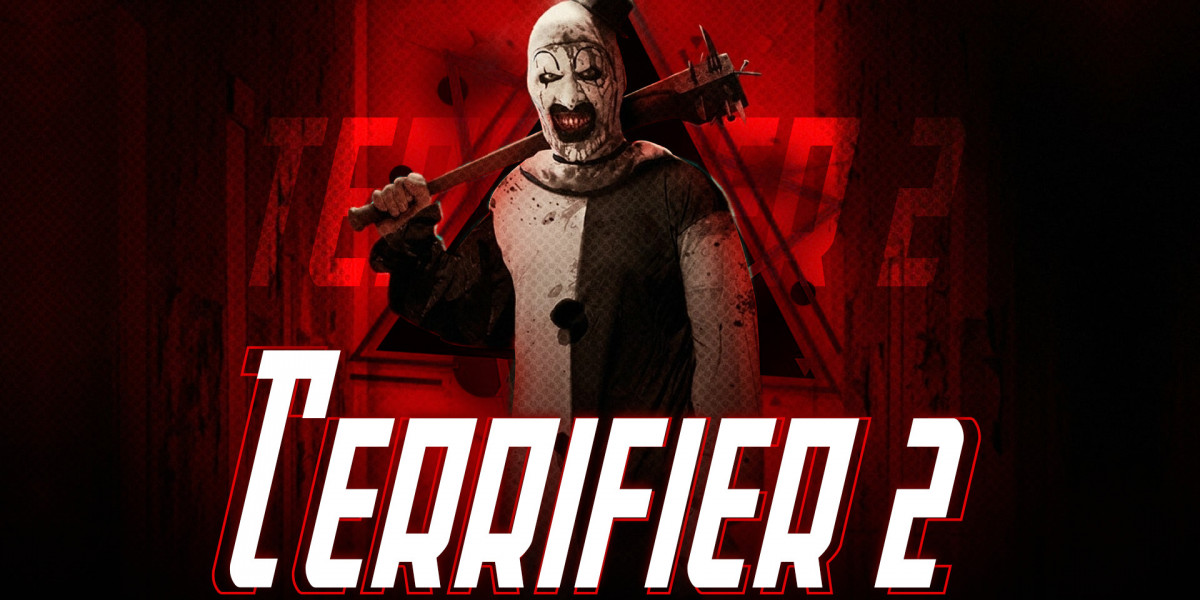
Want to stop a hallway cold? Build an Art the Clown costume that reads instantly from 20 feet away and still looks brutal up close. Here’s a clean, step-by-step guide to nail the Terrifier 2 costume—fit, fabric, makeup, and props—plus budget tips and screen-accurate tweaks. I’ll keep it practical and to the point.
TLDR: What you need
White satin or matte jumpsuit with black cuffs and ankle ruffles
Black neck ruff (3–4 tiers), black gloves
Cone hat with black pom on a headband or clips
Bald cap + white base makeup + black details (eyes, lips, smile lines)
Creepy dentures or blackout tooth paint (optional)
Fake blood and a scuffed trash bag for props
Low-profile black work shoes/boots
Confidence, stillness, and that dead-eyed stare
Brand note: If you’d rather buy than build, check North American Jackets for ready-made pieces labeled the Terrifier costume or mix-and-match separates to match this checklist.
Part 1: Build the suit (the silhouette sells it)
Fabric
Go with a white poly satin if you want that eerie, stage-lit sheen. Prefer a grimmer vibe? A matte twill or cotton broadcloth photographs more “real.” Either way, avoid see-through blends.
Pattern
A loose, straight-through jumpsuit is right. No superhero tapering. You want volume through the torso and leg so the ruffles and cuffs pop.
Cuffs and ruffles
Wrists/ankles: 2–3 inch black bands with a single tier of black ruffle.
Neck ruff: 3–4 stacked tiers. Cut circles of light tulle, organza, or crisp cotton, gather, and stitch to a collar base. Higher ruff = more unsettling.
Closures
Hidden back zipper or front placket with snaps. Keep hardware invisible.
Fit tip
Size up one. Art looks wrong (in a good way) when the suit hangs slightly oversized.
Part 2: Hat, gloves, and shoes (easy wins)
Hat
Cone hat in white with a black pom. Mount it to a wide headband or two alligator clips so it stays put over a bald cap. A wire core helps the cone stay needle-straight.
Gloves
Plain black cotton or thin nitrile gloves. Matte finish > shiny. Wrist-length is fine; tuck under the ruffled cuffs.
Shoes
Flat, black work shoes or low black boots. Keep the profile simple. Scuff them a bit so they look lived-in.
Part 3: Makeup that carries across the room
You can buy a full Terrifier 2 costume and still miss if the makeup is off. Treat this like the main event.
Base
Bald cap first. Glue edges around hairline; blend with latex or silicone.
White grease paint or alcohol-activated white base. Apply thin, even layers with a damp sponge. Powder between layers so it doesn’t crack under heat.
Eyes
Black out the eyelids and extend slightly down and out. Think “sunken” more than “cat eye.”
Lightly gray the under-eye hollows; it helps the black pop without ballooning the shape.
Brows and lines
Block or erase brows under the white base.
Add thin, sharp smile creases from the corners of the mouth; deepen the nasolabial folds with a gray wash.
Lips/teeth
Paint lips black, slightly widened at the corners.
Optional: blackout tooth enamel or a set of gnarly dentures ups the menace.
Edges
Set everything with translucent powder.
Seal with makeup sealer if you’ll sweat under lights.
Practice run
Do a full face once before the con. Time it. You’ll thank yourself.
Part 4: Blood and weathering (use restraint)
The art the clown costume reads best when the outfit looks clean but not new. Think “stage-ready with a history.”
Weathering: Dry-brush a mix of gray and brown acrylics along hems, elbows, and seat. Light touch.
Blood: Use stage blood sparingly—on gloves, hat edge, or one cuff. Too much reads parody, not menace.
Trash bag prop: Crumple and scuff a heavy-duty bag so it isn’t shiny-new. Stuff it lightly so it hangs with shape.
Convention note: If your event has weapon rules, stick to foam or clearly fake tools. You want photos, not a bag check.
Part 5: Pose, movement, and character
Art doesn’t shout. He occupies space.
Stillness: Freeze first, then a slow head tilt.
Angles: Chin slightly down; eyes up. Keep shoulders square.
Hands: Let fingers droop, then snap to a rigid “claw” for photos.
Walk: Heel-to-toe, soft, like you’re trying not to wake a house.
Do less. It’s creepier.
Part 6: Budget vs. screen-leaning builds
Budget (fast)
White medical coverall + black bias tape for cuffs
Pre-made ruff or layered black tulle
Party cone hat modified with fabric cover
Basic grease paint kit
Total: low cost, 1–2 nights of work
Mid-tier (balanced)
Ready-made the Terrifier costume base from North American Jackets, swap in a custom ruff, better hat, and pro makeup
Add weathering and a fitted bald cap
Total: moderate, looks great on camera
Screen-leaning (extra)
Custom satin jumpsuit with hidden closures
Hand-gathered multi-tier ruff, wired cone hat
Alcohol-activated paints, dental SFX, lace bald cap
Total: higher cost/time, photographs like stills
Part 7: Sizing and comfort
Sizing: If between sizes, go up. You can always tweak with side seams or an interior drawcord.
Ventilation: Line the torso with breathable cotton to keep the white from clinging when you sweat.
Emergency kit: Mini powder, small sponge, lip black, and safety pins.
Breaks: Grease paint + heat = meltdown. Schedule breathers and re-powder.
Part 8: Care and storage
After wear: Spot-clean makeup smudges with isopropyl alcohol on a cotton swab.
Wash: Cold, gentle cycle in a garment bag if the fabric allows; otherwise hand-wash.
Dry: Air-dry flat. No direct sun—white can yellow.
Ruff: Store flat in a pizza box or hang by the collar to keep tiers crisp.
Makeup tools: Deep-clean brushes; sanitize dentures and store dry.
Photo checklist (for killer shots)
Backdrop: Plain wall or industrial corridor.
Light: One strong side light for harsh shadows.
Pose set: Neutral stare → slow tilt → hand rise → half-smile.
Detail frames: Eyes, ruff layers, gloved hands, hat seam.
Edit: Desaturate slightly; lift contrast; add a touch of film grain.
Common mistakes (and quick fixes)
Too fitted suit: Let it hang. Add ease at the side seams.
Gloss overload: Knock shine down with a light dusting of translucent powder on satin.
Makeup cracking: Thinner layers, powder between, seal at the end.
Hat wobble: Add a second anchor clip and a small elastic under the hat to grip the bald cap.
Over-blooding: Dab some off with paper towel while wet; mist with water to soften edges.
Quick FAQ
Is this the same as a “Terrifier 2 costume”?
Yes. The look here targets the sequel’s cleaner silhouette and sharper makeup. Listings may say Terrifier 2 costume or the Terrifier costume—both point to Art’s signature look.
Can I buy instead of DIY?
Sure. Check North American Jackets for a base art the clown costume and upgrade the ruff, hat, and makeup for impact.
How long does full makeup take?
First time: 90 minutes. With practice and pre-powdered layers: 45–60 minutes.
Do I need a bald cap?
It sells the character. If you skip it, pull the hat low and black-out your hairline.
Final pass
The difference between “good” and “unsettling” is clean lines and control: a suit that hangs, a ruff that stacks, a hat that doesn’t drift, and makeup that survives heat. Keep the palette strict (white/black + hint of red), keep movement minimal, and let the silence work.
If you want the fast path, start with a labeled Terrifier costume from North American Jackets, then layer the upgrades here. If you want the perfect path, build it—one crisp ruffle at a time. Either way, once the paint dries and the hat locks in, the hallway is yours.
